Consul 服务发现和分布式配置

Consul是一款Go语言编写的开源分布式服务发现和配置管理系统,由美国HashiCorp公司开发。Consul的核心特性包括服务发现和健康检查,此外还提供分布式配置存储功能,可以代替SpringCloudConfig作为配置中心使用。Consul能够搭建为一个分布式的高可用集群,并提供客户端模式供应用连接,生产环境一般建议搭建3-5个Consul的Server节点。这篇笔记我们介绍Consul的使用,以及如何在SpringCloud中实现基于Consul的服务发现和分布式配置。
Consul 官方文档:https://www.consul.io/
Consul Github:https://github.com/hashicorp/consul
Consul安装和启动
安装Consul
Consul是Go语言编写的,不需要什么额外依赖安装比较简单,只需要下载一个可执行文件即可。
https://www.consul.io/downloads
在Linux下,我们可以执行以下命令下载并解压Consul程序。
wget https://releases.hashicorp.com/consul/1.18.0/consul_1.18.0_linux_amd64.zip
unzip consul_1.18.0_linux_amd64.zip
在Windows下我们直接在网页上下载即可,解压后我们就可以得到Consul程序了,我们可以将其加入环境变量方便操作。
以开发模式启动Consul
在开发阶段为了简单起见,我们可以开发模式启动Consul,该模式下能够快速简单的启动一个单节点Server模式的Consul服务。不过要注意,该模式不能用于生产环境,它不持久化任何状态,也不具备高可用的特性。
consul agent -dev
我们可以使用如下命令查看当前Consul启动的节点:
consul members
输出如下:
Node    Address         Status  Type    Build   Protocol  DC   Partition  Segment
ubuntu  127.0.0.1:8301  alive   server  1.18.0  2         dc1  default    <all>
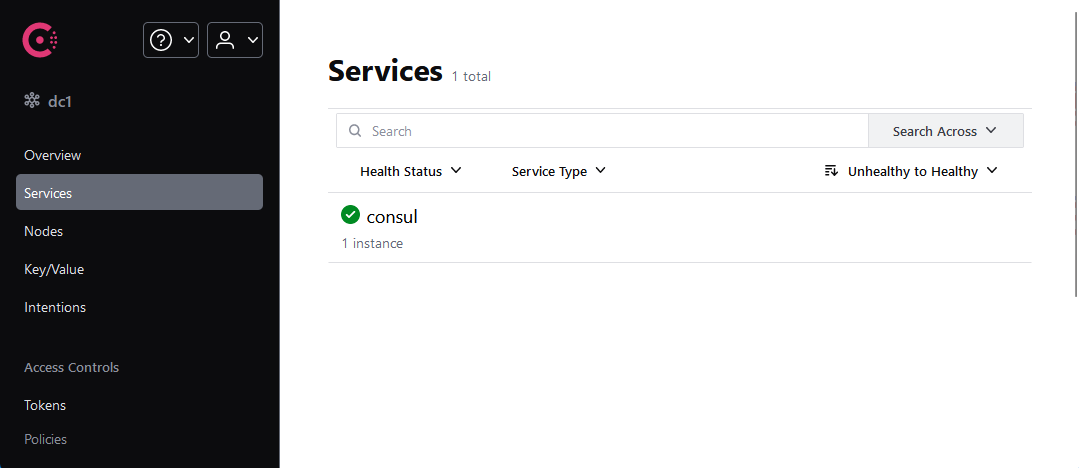
默认情况下,Consul使用8500端口供我们的SpringBoot工程注册服务,此外在该端口还提供了一个Web页面,供我们查看Consul当前的一些信息,包括注册的服务等。注意上面的8301端口用于Consul节点之间的通信,通常用于配置Consul集群模式。
Consul集群搭建
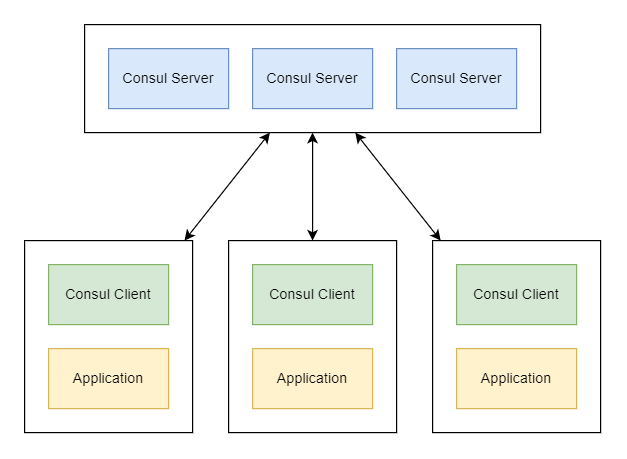
生产环境中不可使用Consul开发模式搭建,通常我们需要搭建一个3-5节点的Server模式Consul集群。Consul被设计为了一种Agent使用模式,每个应用需要启动一个Client模式的Consul,我们编写的Java应用服务连接到Client上,Client负责和Consul的Server集群通信,具体架构如下图。
这里我们准备了三台主机作为演示:
node1 192.168.1.142
node2 192.168.1.143
node3 192.168.1.144
启动集群Server模式,分别在三台主机上执行:
consul agent -server -bootstrap-expect=3 -data-dir=/home/ubuntu/consul -node=node1 -bind=192.168.1.142 -client=0.0.0.0 -datacenter=beijing -ui
consul agent -server -bootstrap-expect=3 -data-dir=/home/ubuntu/consul -node=node2 -bind=192.168.1.143 -client=0.0.0.0 -datacenter=beijing -ui
consul agent -server -bootstrap-expect=3 -data-dir=/home/ubuntu/consul -node=node3 -bind=192.168.1.144 -client=0.0.0.0 -datacenter=beijing -ui
-server:以Server模式启动(默认为Client模式)。-bootstrap-expect:集群可工作的最小节点数。-data-dir:Consul持久化数据的目录,Consul维护的服务状态和分布式配置数据都会存储在这个目录中,因此建议不要使用临时目录。-node:当前Consul节点的名字。-bind:绑定的当前主机IP。-client:允许客户端连接的IP,0.0.0.0表示允许任何客户端连接。
Consul启动成功后,我们还需要将每个节点加入集群,在后两台主机上分别执行如下命令。
consul join 192.168.1.142
此时我们的集群启动成功,我们可以用consul members命令查看:接入集群的节点。
Node   Address             Status  Type    Build   Protocol  DC       Partition  Segment
node1  192.168.1.142:8301  alive   server  1.18.0  2         beijing  default    <all>
node2  192.168.1.143:8301  alive   server  1.18.0  2         beijing  default    <all>
node3  192.168.1.144:8301  alive   server  1.18.0  2         beijing  default    <all>
Server模式的Consul集群搭建成功后,我们还需要在应用节点上启动Client模式的Consul,我们使用类似如下命令启动客户端Consul。
consul agent -data-dir=/home/ubuntu/consul -node=client1 -datacenter=beijing -bind=192.168.1.103 -join 192.168.1.142
此时,我们的应用程序就可以通过Client节点连接到Consul集群了。
基于Consul实现服务发现
下面我们介绍SpringCloud工程中有关Consul的配置和使用,这里我们准备两个微服务product和order,代码的Maven基础模块划分如下。
|_order-svc    # 订单服务
|_product-api  # 产品服务(数据模型和OpenFeign接口)
|_product-svc  # 产品服务
要实现基于Consul的服务发现,首先我们需要引入Consul服务发现的起步依赖,其次由于Consul的健康检查默认是基于Actuator的health端点实现,因此我们还需要引入Actuator的起步依赖。
<dependency>
    <groupId>org.springframework.cloud</groupId>
    <artifactId>spring-cloud-starter-consul-discovery</artifactId>
</dependency>
<dependency>
    <groupId>org.springframework.boot</groupId>
    <artifactId>spring-boot-starter-actuator</artifactId>
</dependency>
在两个微服务的启动类上,我们需要标注@EnableDiscoveryClient,开启服务发现功能。
package com.gacfox.demo.order;

import org.springframework.boot.SpringApplication;
import org.springframework.boot.autoconfigure.SpringBootApplication;
import org.springframework.cloud.client.discovery.EnableDiscoveryClient;

@SpringBootApplication
@EnableDiscoveryClient
public class OrderApplication {
    public static void main(String[] args) {
        SpringApplication.run(OrderApplication.class, args);
    }
}
在application.properties中,我们需要配置Consul服务的相关信息,下面是一个例子。
# 开启Consul服务发现
spring.cloud.consul.enabled=true
# 启动时注册服务
spring.cloud.consul.discovery.register=true
# 关闭时删除注册信息
spring.cloud.consul.discovery.deregister=true
# Consul服务IP
spring.cloud.consul.host=127.0.0.1
# Consul服务端口
spring.cloud.consul.port=8500
# 当前应用程序服务名
spring.cloud.consul.discovery.service-name=${spring.application.name}
其中,如果是开发环境,我们可以连接开发模式Consul;如果是生产环境,则需要每个应用程序实例对应启动一个Client模式的Consul服务,应用程序连接Client模式的Consul,由Client负责和Consul集群通信,这样可以最大程度上实现高可用,避免整个集群的单点故障。
除此之外SpringCloud中针对Consul还有一些其他配置,具体可以参考文档。
基于SpringCloudOpenFeign的微服务调用
SpringCloud中,使用OpenFeign方式调用微服务是比较通用的方案,下面我们编写一个例子作为演示。有关OpenFeign的具体内容,后续章节还会详细介绍。
首先需要引入OpenFeign起步依赖。
<dependency>
    <groupId>org.springframework.cloud</groupId>
    <artifactId>spring-cloud-starter-openfeign</artifactId>
</dependency>
在服务的被调用方,我们正常编写Controller提供HTTP服务,客户端编写与Controller方法签名相同的Feign接口,一个例子如下。
package com.gacfox.demo.product.api;

import com.gacfox.demo.product.model.Product;
import org.springframework.cloud.openfeign.FeignClient;
import org.springframework.web.bind.annotation.GetMapping;
import org.springframework.web.bind.annotation.RequestParam;

@FeignClient(value = "product", path = "/api/v1/product")
public interface ProductClient {
    @GetMapping("/findProductById")
    public Product findProductById(@RequestParam(name = "id") Long id);
}
其中,@FeignClient注解name属性为要调用微服务的服务名,也就是注册到Consul的服务名,path属性为接口对应的基础路径。在服务的调用方引入相关依赖后,SpringCloudOpenFeign会自动帮我们处理该接口,基于动态代理生成接口的实现类并注册到Spring容器,我们直接使用依赖注入即可调用微服务。
在调用端的启动类中,需要使用@EnableFeignClients注解标注,启动Feign相关功能并指定包扫描路径。
package com.gacfox.demo.order;

import org.springframework.boot.SpringApplication;
import org.springframework.boot.autoconfigure.SpringBootApplication;
import org.springframework.cloud.client.discovery.EnableDiscoveryClient;
import org.springframework.cloud.openfeign.EnableFeignClients;

@SpringBootApplication
@EnableDiscoveryClient
@EnableFeignClients(basePackages = {"com.gacfox.demo.product.api"})
public class OrderApplication {
    public static void main(String[] args) {
        SpringApplication.run(OrderApplication.class, args);
    }
}
如上配置后,我们就可以进行微服务调用了,下面是一个例子。
package com.gacfox.demo.order.controller;

import com.gacfox.demo.order.model.Order;
import com.gacfox.demo.product.api.ProductClient;
import org.springframework.web.bind.annotation.GetMapping;
import org.springframework.web.bind.annotation.RequestMapping;
import org.springframework.web.bind.annotation.RequestParam;
import org.springframework.web.bind.annotation.RestController;

import javax.annotation.Resource;

@RestController
@RequestMapping("/api/v1/order")
public class OrderController {
    @Resource
    private ProductClient productClient;

    @GetMapping("/findOrderById")
    public Order findOrderById(@RequestParam(name = "orderId") String orderId) {
        // ... 具体业务逻辑
    }
}
基于Consul实现分布式配置
Consul除了服务发现功能也提供了分布式配置功能,我们可以将其作为分布式配置中心使用,代替基于Git仓库的SpringCloud Config,实际开发中我们也推荐使用Consul、Nacos、ApolloConfig等作为分布式配置中心,而非使用SpringCloud Config,本系列笔记也移除了SpringCloud Config相关章节。
Consul实现分布式配置十分简单,SpringCloud都已经为我们封装好了,我们首先需要在工程中引入以下Maven依赖。
<dependency>
    <groupId>org.springframework.cloud</groupId>
    <artifactId>spring-cloud-starter-consul-config</artifactId>
</dependency>
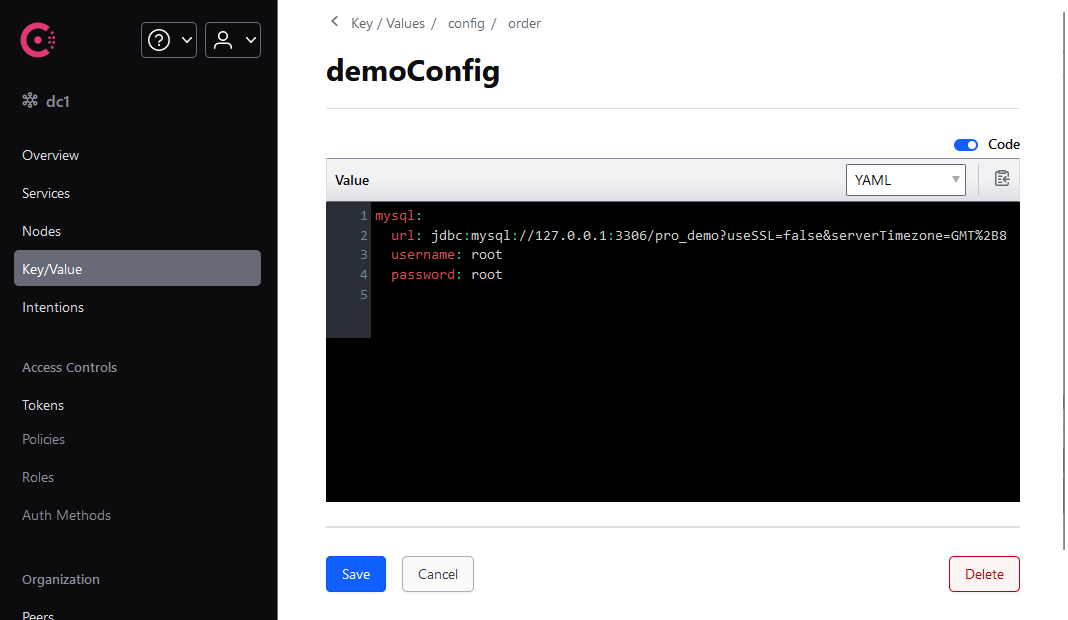
Consul中维护的配置其实就是维护一组Key/Value键值对,其中Key是一个由不同部分拼接成的字符串,Value则是一个特定格式的配置文件(推荐使用YAML格式)。下图中,我们创建的Key为config/order/demoConfig,YAML格式值如下图所示。
工程配置application.properties中,我们对SpringCloudConsulConfig功能进行如下配置。
application.properties
spring.config.import=optional:consul:127.0.0.1:8500
spring.cloud.consul.config.data-key=demoConfig
spring.cloud.consul.config.format=yaml
spring.cloud.consul.config.watch.enabled=true
spring.cloud.consul.config.watch.delay=1000
注意在SpringCloud的早期版本中,此处可能推荐使用bootstrap.properties,但新版本引入了spring.config.import功能,它能够在读取application.properties的其它配置之前先从Consul分布式配置中心中拉取配置,我们只需要指定Consul的主机和端口号,这样我们在application.properties编写如上全部配置即可。其余配置指定了配置的键名,配置文件格式,是否刷新和刷新监控间隔时间,关于更多配置选项我们可以参考官方文档。
实际上SpringCloud对配置的键名有一定的约定和要求,我们指定spring.config.import=optional:consul:127.0.0.1:8500配置后,它默认会从Consul的配置中按照优先级从高到低搜索以下命名空间(可以理解为Key的前缀):
config/order,dev/
config/order/
config/application,dev/
config/application/
例如前面我们配置的键config/order/demoConfig实际上就位于上面第二行的约定中,其中config是一个固定的约定前缀;order是我们的服务名,即spring.application.name中配置的名字,我们也可以指定为application,此时所有服务都可以读取该配置,但其优先级较低;此外我们也可以指定一个类似dev的Profile名实现多环境配置,它和服务名之间默认使用逗号连接,我们也可以通过配置将其修改为例如短横线-等;demoConfig则是具体的键名。如上部分拼接到一起最终构成Consul中的Key名字config/order/demoConfig。
在Java代码中引用配置也很简单,我们直接使用@Value等方式引用配置即可。例子如下:
@RefreshScope
@RestController
public class DemoController {
    @Value("${mysql.url}")
    private String url;

    // ...
}
代码中我们直接使用@Value注解读取配置即可,@RefreshScope能够实现配置的自动刷新,该注解是SpringCloud提供的,用于实现修改配置中心的内容时应用内的配置的热更新,如果不需要热更新功能可以将其去掉。